
Below are some frequently asked questions we get from our customers. If you have any questions that aren't answered here, please contact us.
I need a product that isn't on your website, can you build one for me?
Possibly. You will need to contact us with the specifics of what you are after and if we have the materials to build it for you, we will let you know. If we can't, we will try to point you in the right direction. Same goes for prototypes or custom work that is posted to our social media. Keep in mind that if you have something custom made, it is NOT subject to our return policy, and is considered a final sale. Also, please understand that custom work will take more time and sometimes cost more money, but the up side is that you get exactly what you want.
Can you make custom changes to one of your products? Add Velcro, Elastic etc?
Yes, within reason. All of our products are designed in house and are made to order, so this allows us the ability to customize almost anything to a users specification. However, major design changes probably aren't going to happen, simply due to the time required. You will need to contact us and let us know what you need. If there are any additional charges, we'll tell you up front. Again, if it's custom, it's a final sale.
Are all of your materials made in the USA?
The short answer is no. Although we try to source all materials from North American suppliers, some parts, like the AustriAlpin Cobra Buckles, are only made in Europe and far superior to the US made product.
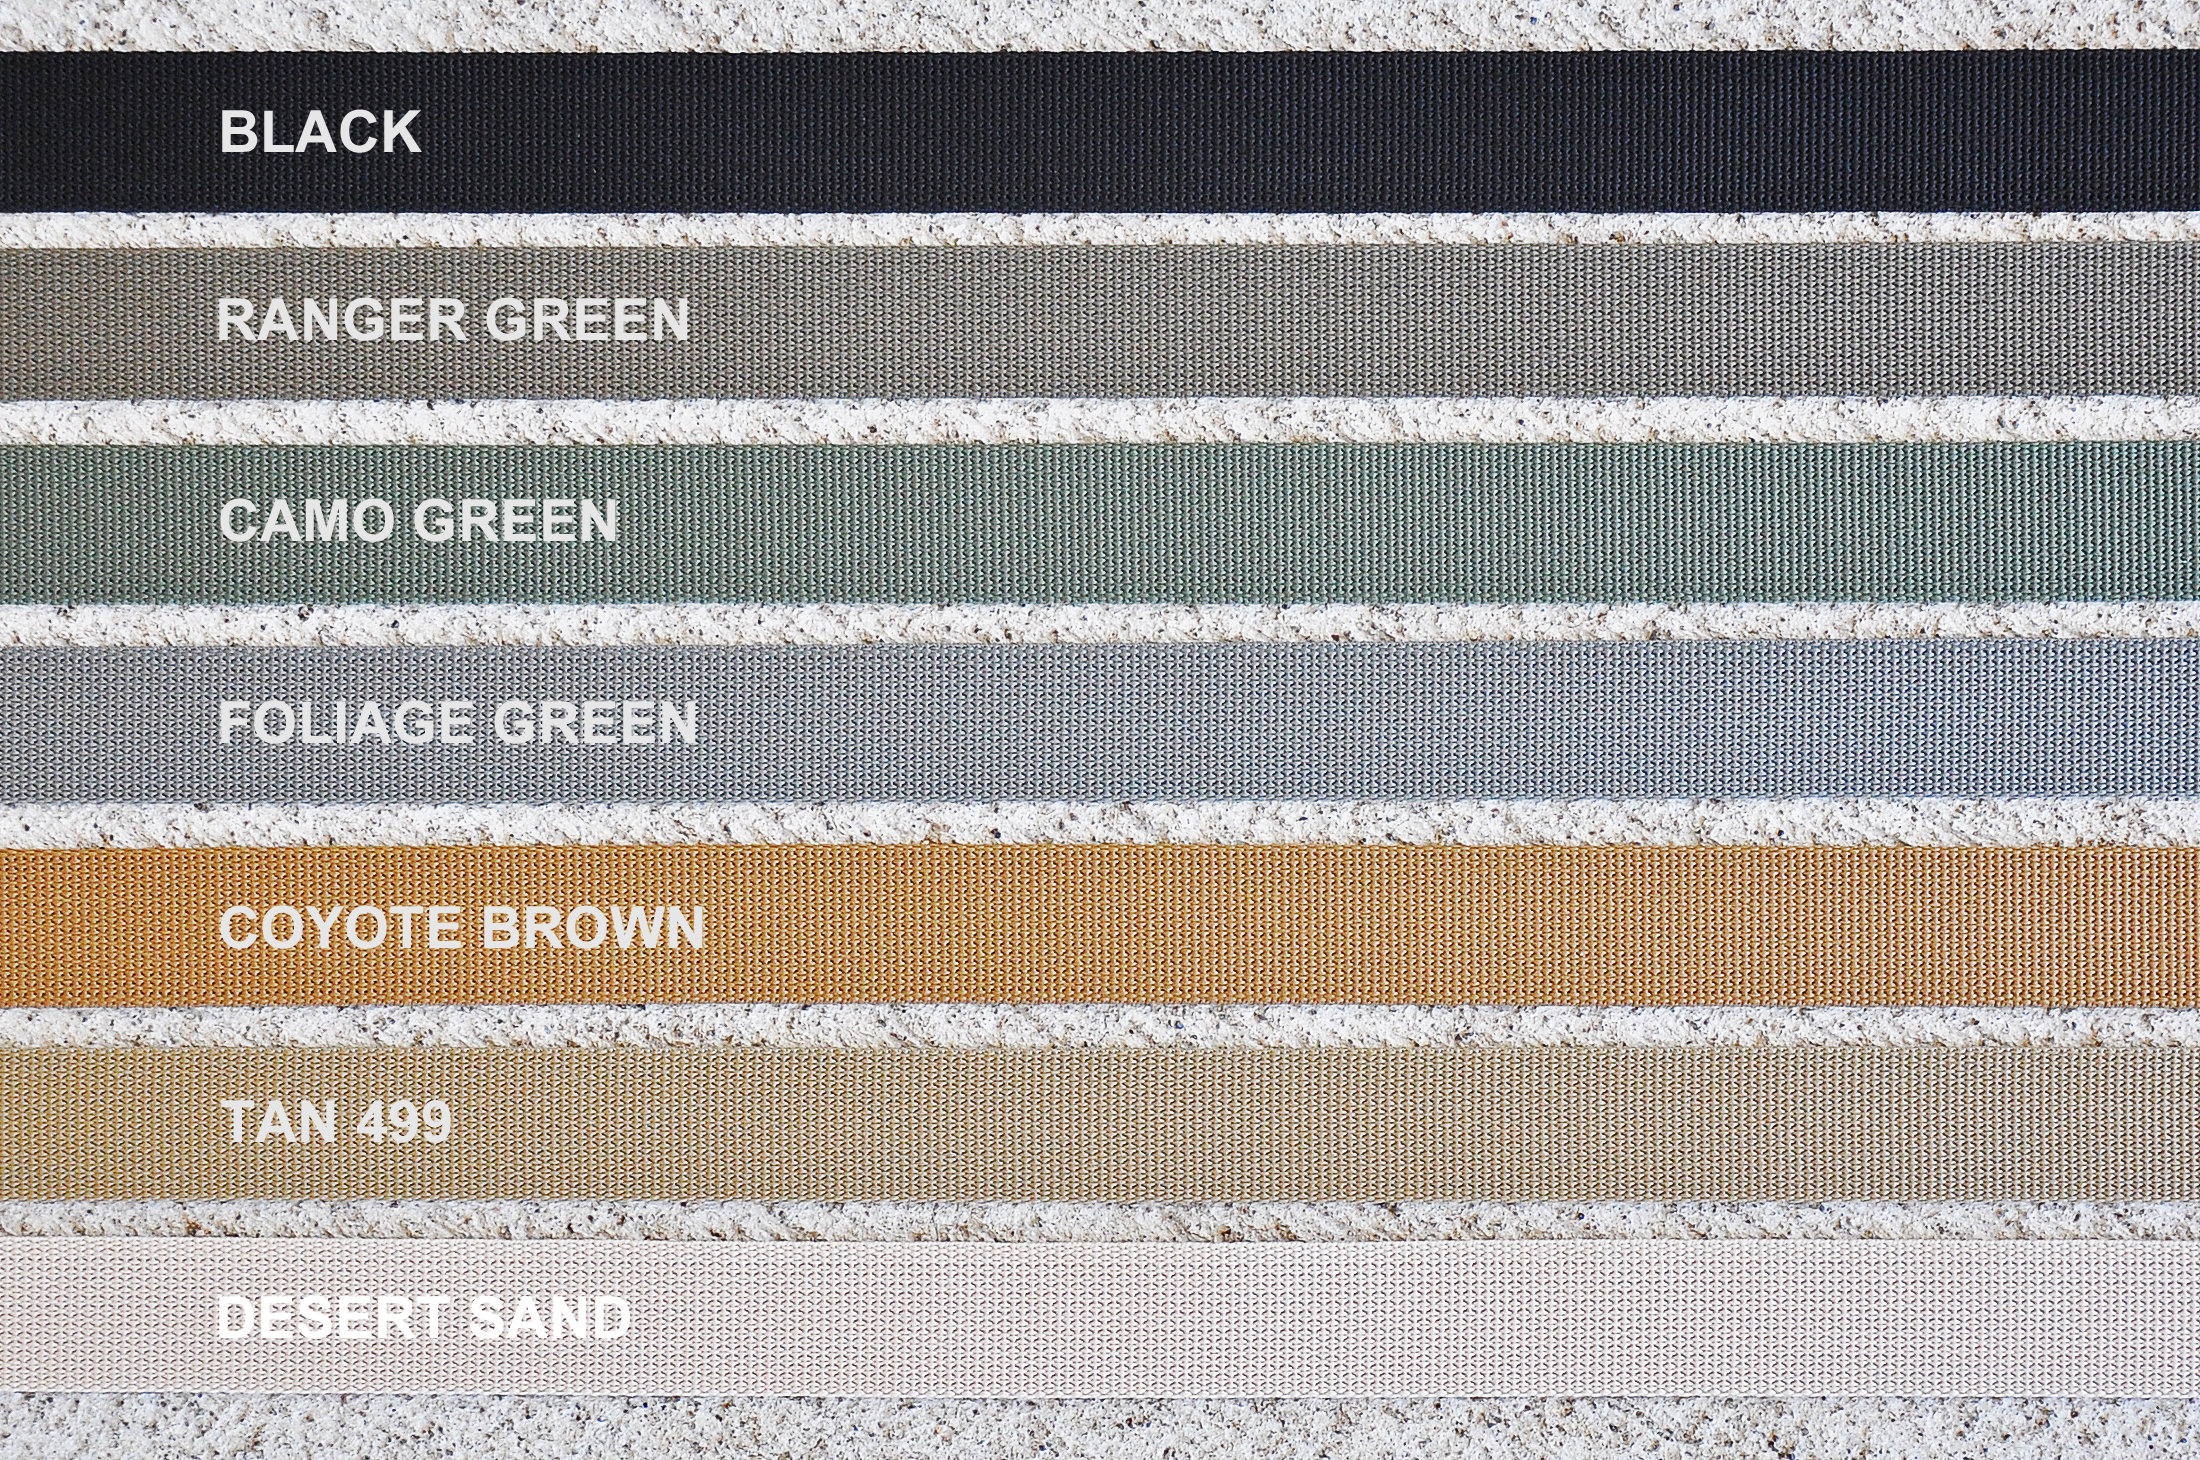
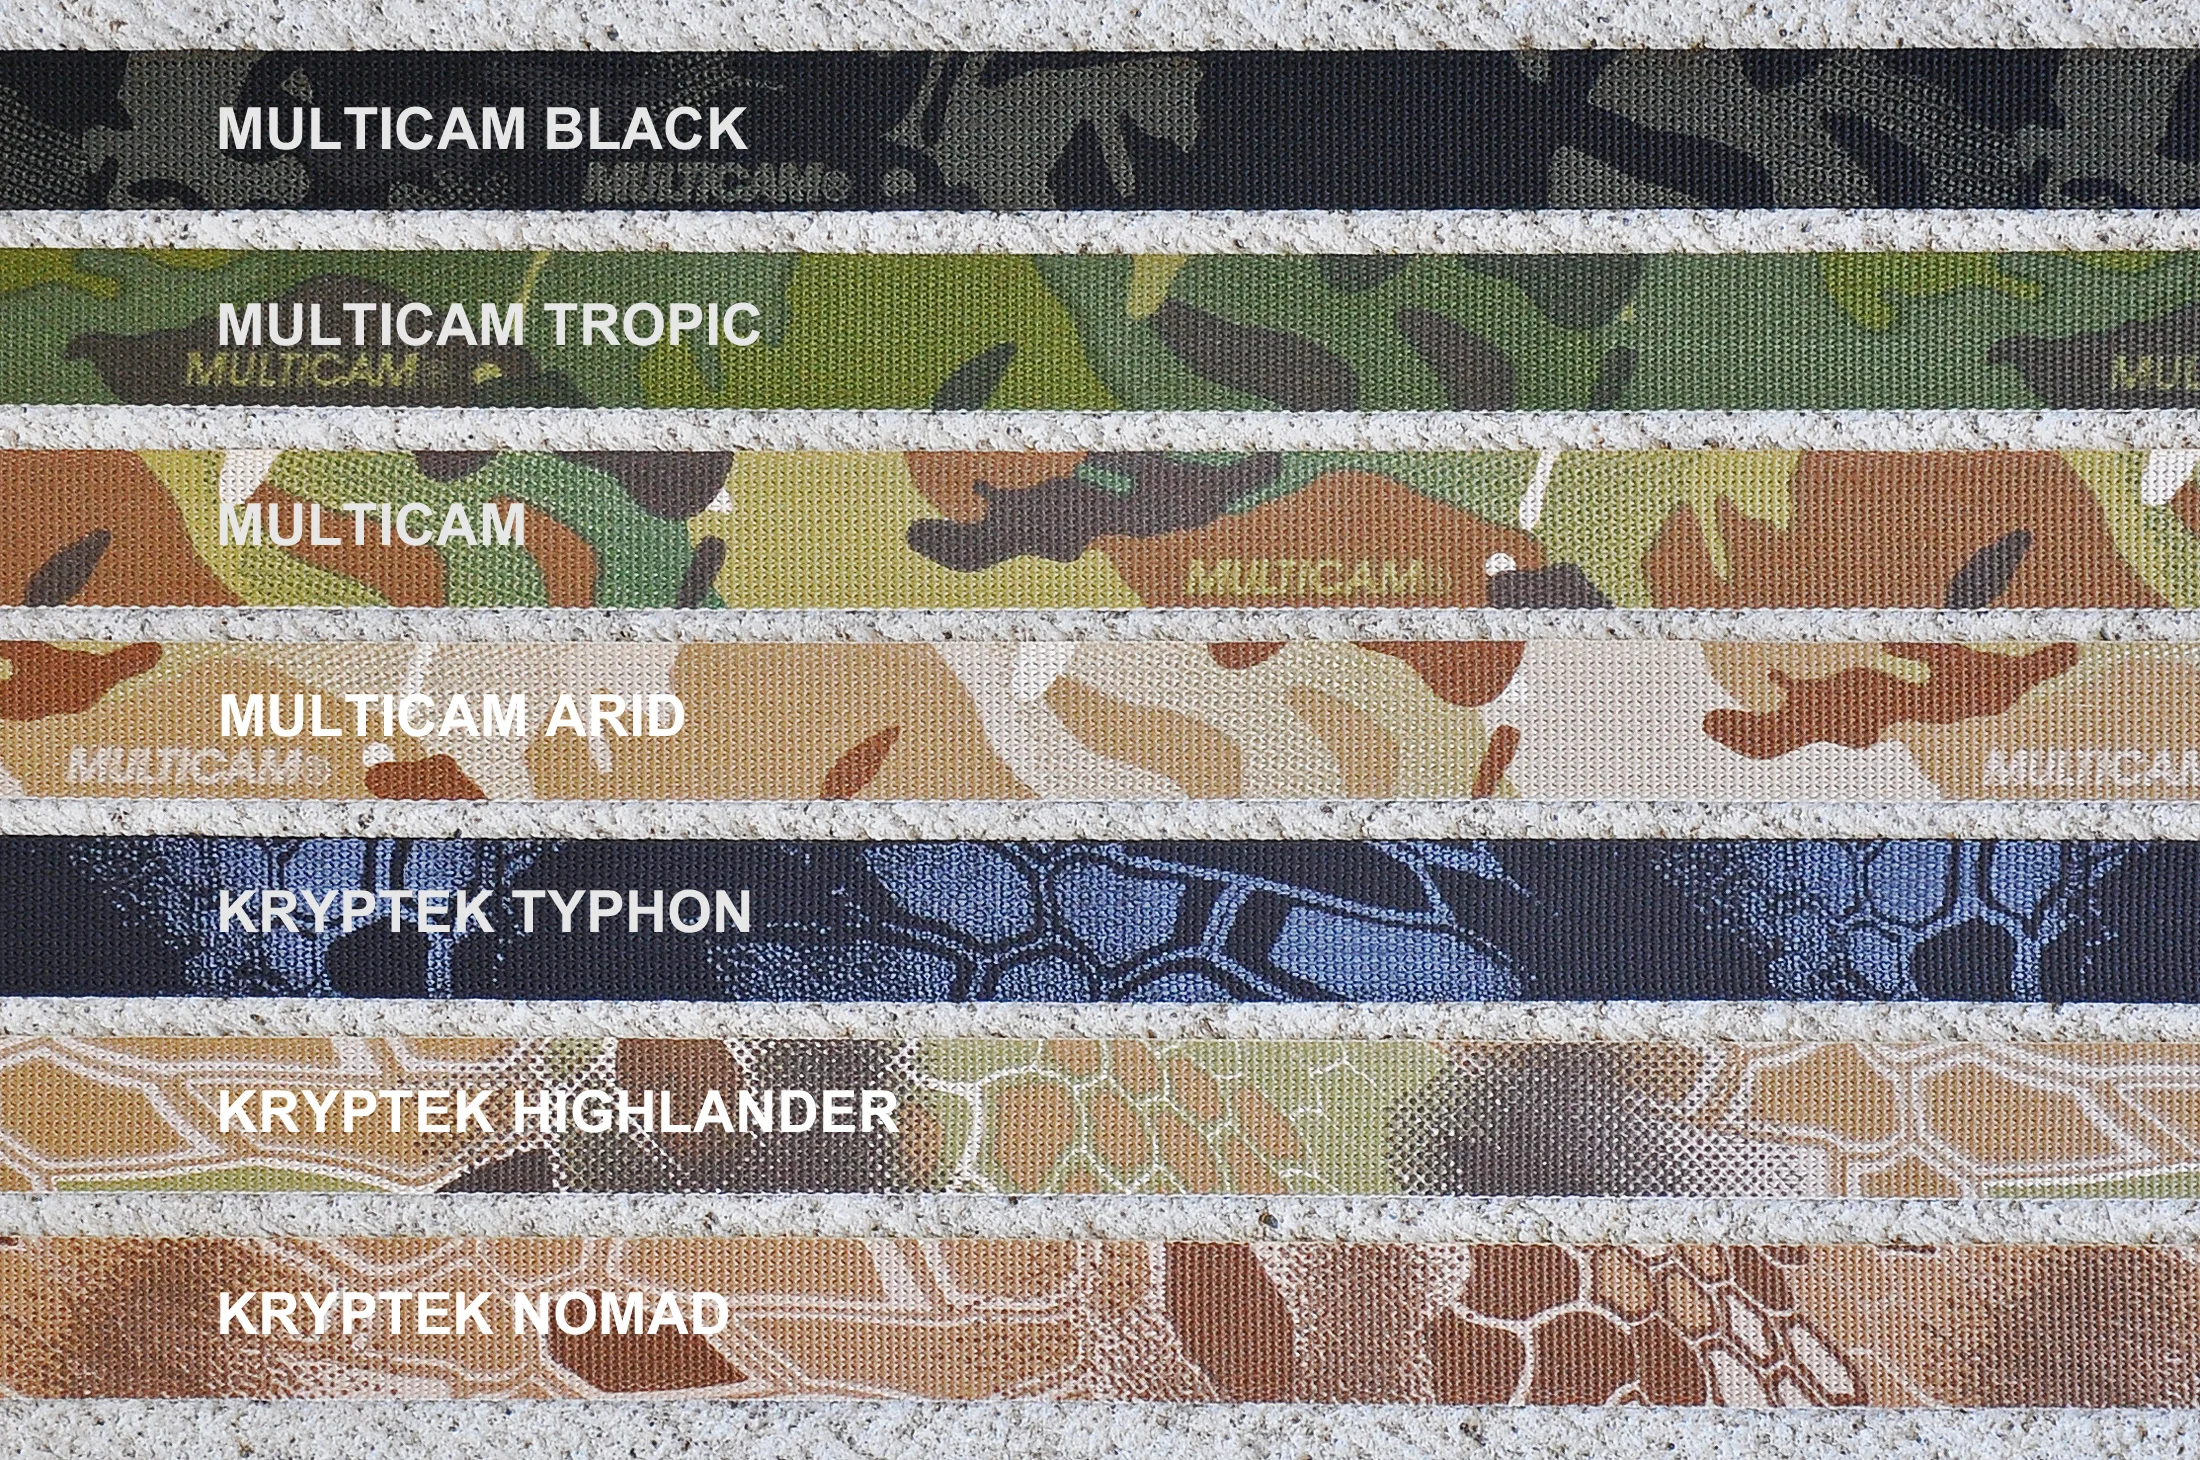
What does this colour look like?
The pictures below are good visual reference of the various colour options available for our products. Most of these solid colours and patterns are standardized across the industry, but If you still need help choosing the right solution, please contact us. If a colour or pattern is not listed in the drop down, chances are we unable to make the product with it.

Belt Sizing
Our belt sizing is based on your actual physical measurement in inches, NOT YOUR PANT SIZE. To ensure a proper fit, measure around where you would normally wear your belt, wearing the clothing you would normally be wearing (Combat Pants, Uniform), then select the size option that best matches the desired adjustment range. Please keep in mind that any items you slide onto your belt (holster, legacy duty pouches etc.) will increase the circumference. The low end of the adjustment range is the “tightest” the belt will go. The high end is the largest you should wear it, but not the limit of expansion. It is recommended you size as close to the low end as possible.
SMALL 34” - 37” (18 PALS Channels)
MEDIUM 37” - 40” (20 PALS Channels)
LARGE 40” - 43” (22 PALS Channels)
X-LARGE 43” - 46” (24 PALS Channels)
CUSTOM SIZING: We are able to increase or decrease the size by approximately 1.5” increments to effectively create half sizes. For example, we can make a “Medium+” that would have an adjustment range of 38.5” - 41.5”. Please contact us directly if you’d like to have custom sizing on your belt. NOTE: Any belts made with custom sizing are “final sale” and are NOT subject to our return policy.
Modular Gun Belt Assembly Instructions HERE
Advanced QR Cummerbund Sizing
The sizing below is the approximate chest size range for the Advanced QR Cummerbund when used with our plate carrier and standard ESAPI plates. Measure the chest in the normal fashion, wrapping the measuring tape around the body at nipple height. Note, these measurements assume the user is placing the front velcro so the Tubes buckles are just off of the front plate, as shown in our pictures.
SMALL (Custom) 37” - 44” (6 PALS Channels per Side)
MEDIUM (Standard) 40” - 47” (7 PALS Channels per Side)
LARGE (Custom) 43” - 50” (8 PALS Channels per Side)
SCRIM ASSEMBLY
Locate the front of the scrim. It will have a small laser cut index hole, and you will see a dashed line along the base of the centre shape. This dashed line is in case the user wants to cut out the shape for an NVG mount, but it usually isn't required. The rear of the scrim also has an index hole, but no dashed cut line.
Insert each end of the supplied shock cord through the small slits to the left and right of the front index hole, starting from the bottom side and pushing the cord through to the topside. Once both ends of the cord are through their respective slits, centre the scrim along the cord before continuing.
Starting with one end, weave the cord in and out, around one complete side of the scrim, until you reach the rear index hole. At this point, you may want to install the Cordloc on the end just to keep the cord from pulling back through.
Weave the other side of the scrim and, If done correctly, both ends of the shock cord will finish on the topside, to the left and right of the rear index hole.
Install the Cordloc and tie the end of the cord with an overhand knot.